Autoguiding with a telescope
The quickest and most convenient way to create impressive astrophotography. Here you can find out what you need.

Successful astrophotography with your telescope
Photographs of deep sky objects belong to the premier league of astrophotography. These faint objects often require exposure times of several minutes instead of just a few seconds. If we just let the mount run, problems immediately start and we'll see unattractive star trails on the image. In this article, you will see at a glance how autoguiding can help you achieve the perfect image.
Why do we need autoguiding?

A mount that we let run uncontrolled will generate such images after 1-2 minutes. The mount drifts from the target location. The longer the exposure time, the more errors we will see in the image.

Here's a perfectly tracked image with point-shaped stars. The exposure time and the exact course of the mount were automatically checked and corrected by a special monitoring camera. We call these cameras autoguiders.
What will you need for autoguiding?
For autoguiding, i.e. the automatic creation of astrophotography images, you need the following equipment:
- An equatorial GoTo telescope with an ST-4 port
- The camera equipment you use to take the photograph
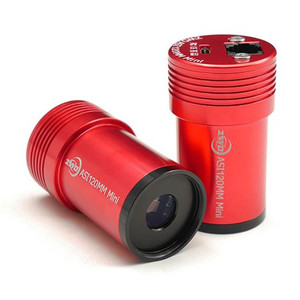
- An autoguiding camera with ST-4 and USB cables
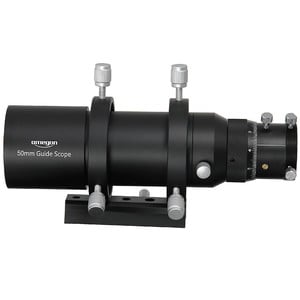
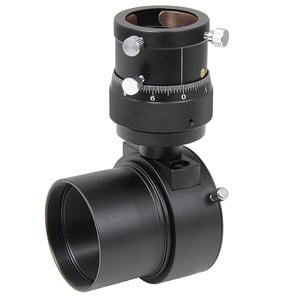
- A guidescope or an off-axis guider
Installation tips

Option 1
A guidescope is mounted parallel to the telescope using guidescope rings. As you can see in the diagram, the autoguider is located at the end of the guidescope. The role of the autoguider: it follows a guide star and immediately sends a correction command to the mount if there is any deviation. The camera that exposes the image of the nebula or galaxy is located on the main telescope.

Option 2
An off-axis guider is positioned behind the telescope, and deflects a small part of the light upwards via a prism to the autoguider which makes the necessary corrections during tracking. The camera you will use to capture deep sky objects is then attached.
Guidescope, off-axis guider and autoguider
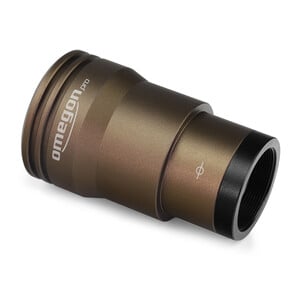
The easiest way to get started is with an autoguiding camera with a ST-4 cable and a USB port. The ST-4 cable is connected to the dedicated port on the mount. You then connect the USB cable to a PC or laptop. The image from the camera, including that of the guide star, is then displayed on the PC screen. All you have to do is select the guide star on the computer, and let the autoguider and mount do all the work.

The Omegon 50-mm or 60-mm mini guidescopes are suitable for a refractor or a Newtonian telescope. The Touptek Autoguider is highly sensitivity and has small pixels. If a quick set-up, easy handling and low weight are important to you, then this is the ideal choice.

The Omegon off-axis guider #49752 and the Touptek Autoguider are suitable for a Schmidt-Cassegrain or Maksutov telescope. The main telescope optics are also used as a guidescope. An off-axis guider is always the better choice for a SCT.
Why is guiding required for astrophotography?
 Cocoon nebula IC 5146, picture: Carlos Malagón
With accurate polar alignment, ordinary mounts allow exposure times of around 30 seconds, although this is driven by the focal length of the imaging optics. Together with the pixel size, the focal length determines the resolving power. With a 200-mm telescope and a digital SLR camera (DSLR), 2-minute exposures are possible, whereas if you are using a telescope with a focal length of several metres, then you have no more than a few seconds.
For bright objects such as the Moon and the planets, only short exposure times are required, so simple tracking is sufficient. But deep sky objects beyond the Orion Nebula will require a telescope tracking control. Exposure times from several minutes up to a few hours are desirable. The general principle is: the longer, the better.
Deep sky objects require tracking control
The reason for this is chip noise. There are 2 types of noise: thermal noise and read-out noise. Thermal noise increases linearly with exposure times. It can be reduced by, for example, cooling. Read-out noise occurs with every frame. 10 images each with a 1-minute exposure will deliver a worse result than a single image with 10 minutes exposure. Read-out noise can only be optimised through long exposure times. With short exposure times, the read noise exceeds the thermal noise and the quality of the image is affected.
Images with DSLR cameras are exposed for between 2 minutes and 20 minutes, depending on the aperture ratio, target object and light pollution. With cooled CCD cameras, the dynamic range is greater and the exposure times can be increased further. For small, faint objects, with long focal lengths and filters, several hours are possible.
Depending on the telescope design and user requirements, there are different tracking solutions. Until a few years ago, analogue images were tracked by eye using a reticle eyepiece. Digital technology’s improved resolution makes this impossible today. As a rule, tracking is digitised and is undertaken by a guide camera. In addition to the camera that photographs the object, a second camera, which is aligned with a guide star, is used. This second camera registers the smallest deviations by the mount and sends it a correction signal to avoid continuing tracking errors.
 NGC 3184, Image: Carlos Malagón
 PC autoguider
Besides custom solutions, there are two types of guide cameras: PC and stand-alone autoguiders. PC guiders loop the signal from the guide star to a PC and send the correction signal from the PC to the mount. This has several advantages: you can select and focus the guide star using a live image on the PC. This mean that you will always find the optimal focus. In addition, the PC software offers many parameters to optimise your settings. This doesn’t take up a great deal of time since the effect can be monitored live on the screen. PC guiders are usually cheaper to buy because they do not need a screen. However, the PC itself is an additional cost factor. This solution increases the power requirement and requires additional cables that can be tripped over in the dark.
Stand-alone autoguider
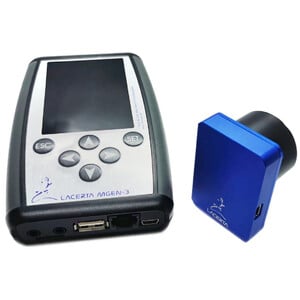
Stand-alone autoguiders make life a lot easier for astrophotographers who use DSLR cameras. The advantage: they do not require a separate laptop, and save on additional weight and accessories. It will easier to make your celestial photo session a success.
While the technology was still very immature a few years ago, it has now developed into a valuable tool for successfully guided astrophotos.
With astrophotography, in particular, you rely on good accessories. Therefore, you should invest in an excellent device, such as the Lacerta MGEN or the StarAid Revolution.
The standard solution: the PC guider
All in all, stand-alone guiders represent a very niche segment of the autoguiding market. Guiding with a PC is standard. This is especially true when using a cooled CCD where a computer is anyway required. There is a wide range of autoguiders available, and many planetary webcams also have a guider port. There are reasonably-priced models from ZWO, Touptek, Orion, QHYC and many other manufacturers. Webcams are available for under €200, with the better models costing a little more. If you want to use the webcam primarily for tracking, you should opt for a monochrome device: colour cameras are less sensitive. In any event, the camera must have an ST-4 port. A cable compatible with this port is also available (product no. 23248).
The PHD2 freeware has become the most popular guiding software. A free download is available at http://openphdguiding.org/. The software is in English and is very well documented.
It all depends on the mount
 Andromeda Galaxy M31, image: Carlos Malagón
The key to successful deep sky photography is a stable mount. Stability depends on the size of the optics. Please note: the manufacturers’ load carrying capacity usually refers to visual use. The photographic load capacity is usually 30% to 50% lower than the stated values. On the whole, a small, lightweight system often delivers better results than a giant telescope that shakes with every breath of wind.
Equatorial mount with autoguider port
The equatorial mount setup is important. Altazimuth mounts are unsuitable for autoguiding due to field rotation. A polar wedge must therefore be used for fork-mounted devices. In addition, the mount must have an autoguider port. The port looks like a telephone or network socket, usually marked with "autoguider" or "ST-4". The autoguider port is standard on almost all GoTo devices from around €700 upwards.
Equatorial mounts without GoTo can often be retrofitted. This applies to Skywatcher models EQ-3-2/NEQ-3 and the EQ-5/NEQ-5, to Bresser and Omegon models Exos-2 and EQ-500, as well as to the CG-4 from Celeston and the Skyview from Orion. A GoTo upgrade is the optimal solution, but costs almost as much as the mount itself. For Skywatcher there is a solution with simple motors which can be found under product numbers 46067 and 46068. The Star Adventurer travel mount is a special case. It has an autoguider port, but it only has motors on one axle. With very accurate polar alignment and focal lengths below 400mm, this is sufficient for a few minutes of exposure time.
Off-axis or guidescope?
The PHD2 guiding software works with sub-pixel accuracy. With this, tracking errors can be corrected before they become visible on the image. Traditionally, the focal length of the tracking optic should be at least half the focal length of the main telescope. However, this figure has fallen in recent years. The reason for this is the tracking cameras’ ever finer pixels. For recent models with pixels of just 3 microns, 30% of the main tube focal length is sufficient.
Guidescopes have become smaller in recent years thanks to ever smaller pixels. Meanwhile, there are solutions available for the finder shoe with 50 mm to 60 mm aperture and less than 300 mm focal length. With fast refractors and Newtonians with up to 1,000 mm focal length, this accuracy is sufficient.
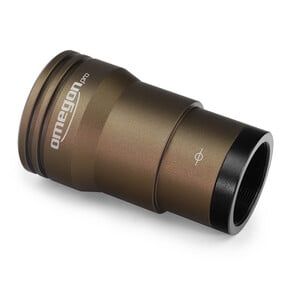
These simple guidescopes have a short focus travel. Since different autoguider cameras have different flange focal lengths, it may be necessary to use an extension tube. The tube which can be found under product number 33231 is suitable for this purpose.
Up to 2 tubes may be required, depending on the camera. If you want to avoid playing around with tubes, you can buy a matching set.
Low-cost guidescopes are simple Fraunhofer optics with chromatic aberration. In order to get sharp stars, at least an IR blocking filter should be used. The semi APO filter from Baader is a good choice, which also eliminates blue fringe.
 Omega Nebula M17, picture: Carlos Malagón
Off-axis for mirror telescopes
Guidescopes are a very good solution for refractors. Their use with mirror telescopes can be problematic, as the floating primary mirror can move relative to the guidescope with longer exposure times. The following equation applies to the mirror: angle of incidence = angle of reflection. Therefore, the effect of misaligned incident light is doubly noticeable. For a Newtonian with exposure times of a few minutes this may not be a problem, but for a Schmidt-Cassegrain or a Maksutov the issue is critical. The light is directed three times through the tube, which amplifies the impact of the misalignment. The corrector plate, primary mirror and secondary mirror are optically effective and, at the same time, can lead to misalignment. The Celestron Edge HD has a fixed primary mirror and can be used with a guidescope for at least a few minutes. The manufacturer offers a solution with product number 21901. However, the use of a guidescope is not possible with a classic SC or Maksutov. Here you have to work with an off-axis guider.
In an off-axis system, the main telescope is also used as a guidescope. This is possible by using a small prism to divert a small portion of the light. The prism is movable, but it is often very difficult to find a sufficiently bright guide star. Therefore, a guide camera should be used that is as sensitive as possible. The Lodestar from Starlight (product number 44835) has a good reputation. The Orion StarShoot Mono (product number 46361) is also very popular. Maksutov and SC telescopes have large back focus distances.
The positions of the focal point of the guide camera and the main camera must be coordinated. Since different camera manufacturers use different focal lengths, extension tubes must be used here. Whenever the optical path of the main camera is extended, the guide camera focus also shifts outwards. There are three tubes in this set.

